
Introduction
If you’re looking to impress at your next gathering without spending all day in the kitchen, then learning how to make pinwheel cookies is a must! These delightful and colorful treats are not only visually appealing but also incredibly easy to whip up. Perfect for young professionals who love homemade food but might be pressed for time, pinwheel cookies blend simplicity with a touch of creativity.

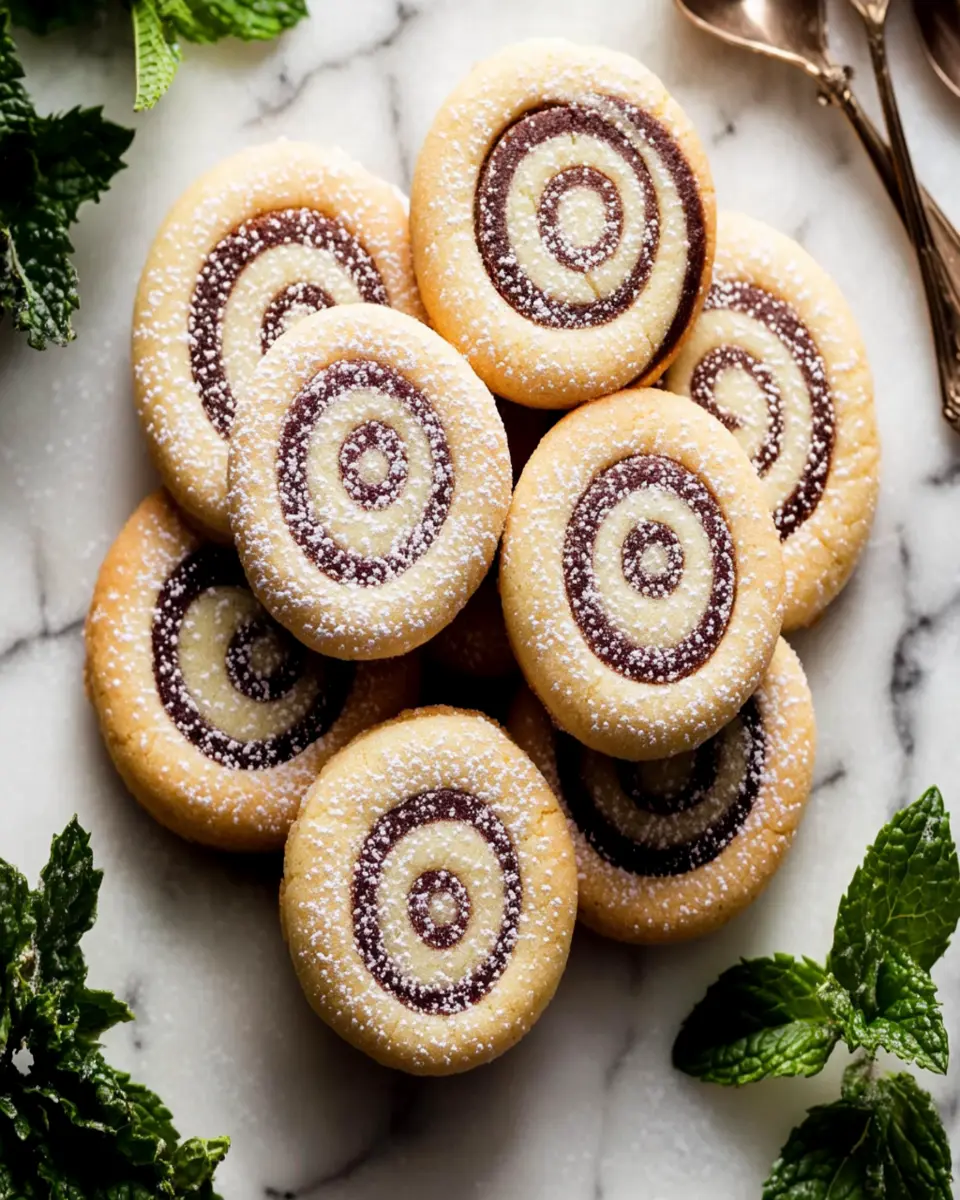
Imagine the joy on your friends’ faces when you present a platter of these swirled wonders, each one bursting with flavor and adorned with festive sprinkles. They’re versatile, too; whether you’re hosting a birthday party, holiday celebration, or just a casual afternoon tea, pinwheel cookies fit right in. Plus, with their unique design, they offer a fun twist that sets them apart from standard cookies.
So, what exactly makes pinwheel cookies so special? The answer lies in their delightful combination of buttery vanilla and rich chocolate flavors, creating a beautiful contrast that is as pleasing to the taste buds as it is to the eyes. In the following sections, we’ll dive into the ingredients and step-by-step instructions to make these cookies a staple in your baking repertoire. Get ready to roll up your sleeves and create something truly spectacular that will have everyone asking for your secret recipe!
Key Ingredients
To create the delightful pinwheel cookies that are sure to impress, you’ll need a few key ingredients that work together to deliver flavor and texture.
Unsalted Butter (1 cup)
Unsalted butter is essential for achieving the perfect creamy texture and rich flavor in your cookies. It helps the cookies bake evenly, ensuring they are soft and delicious.
Granulated Sugar (1 cup)
Granulated sugar not only sweetens the cookies but also contributes to their golden color and tender crumb. It’s a fundamental ingredient that balances the rich flavors of butter and cocoa.
Eggs (2 large)
Eggs act as a binder in the dough, providing structure and moisture. They also add a slight richness to the cookies, enhancing the overall flavor.
Vanilla Extract (1 teaspoon)
Vanilla extract is the secret ingredient that elevates the flavor profile of the cookies. It adds a warm, aromatic essence that complements both the vanilla and chocolate layers beautifully.
All-Purpose Flour (3 cups)
All-purpose flour is the backbone of the cookie dough, providing the necessary structure. It absorbs moisture and helps create a chewy texture, making every bite satisfying.
Baking Powder (1 teaspoon)
Baking powder acts as a leavening agent, helping the cookies rise slightly while baking and ensuring they have a light, tender crumb.
Salt (1/4 teaspoon)
A pinch of salt enhances the overall flavor of the cookies, balancing the sweetness and highlighting the rich chocolate notes.
Cocoa Powder (1/2 cup)
Cocoa powder is what gives one layer of the pinwheel its deep, chocolatey flavor. It adds richness and depth, creating a wonderful contrast with the vanilla layer.
Colorful Sprinkles (1/4 cup, optional)
Colorful sprinkles add a fun and festive touch to the cookies, making them perfect for celebrations or a cheerful treat any day. Feel free to get creative with your sprinkle choices!
By combining these ingredients, you’ll create a delightful treat that’s perfect for any occasion. Now, let’s get baking and learn how to make pinwheel cookies!
Why You’ll Love This Recipe
Pinwheel cookies are not just a treat for your taste buds; they’re a feast for your eyes as well! This recipe is perfect for young professionals who love to impress their friends with minimal effort. With vibrant colors and a delightful swirl of flavors, these cookies look as good as they taste.
Imagine serving a platter of these beautiful cookies at your next gathering. They’re not only delicious but also incredibly simple to make, allowing you to whip up a batch in no time. From the moment you roll out the dough, the anticipation builds as you create the stunning pinwheel design.
What’s even better is their versatility! You can easily customize the flavors and colors to suit any occasion. Want a fun twist for a birthday party? Add some food coloring or flavored extracts to the dough. Craving a seasonal treat? Use autumn spices or festive colors for the holidays. The options are endless!
In short, learning how to make pinwheel cookies is a game-changer in your baking repertoire. These cookies are sure to become a favorite for any event, proving that a little creativity in the kitchen can lead to delightful results. So, roll up your sleeves and get ready to impress your friends with these delicious, colorful treats!
Variations
Pinwheel cookies are wonderfully versatile, allowing you to get creative and tailor them to your tastes or occasions! Here are a few delightful variations to consider.
Flavor Twists
You can easily switch up the flavors by using different extracts. For a citrusy twist, try adding lemon or almond extract instead of vanilla. If you want a richer taste, consider incorporating a few tablespoons of peanut butter into the vanilla dough. These small changes can lead to exciting new flavor profiles that elevate your cookies.
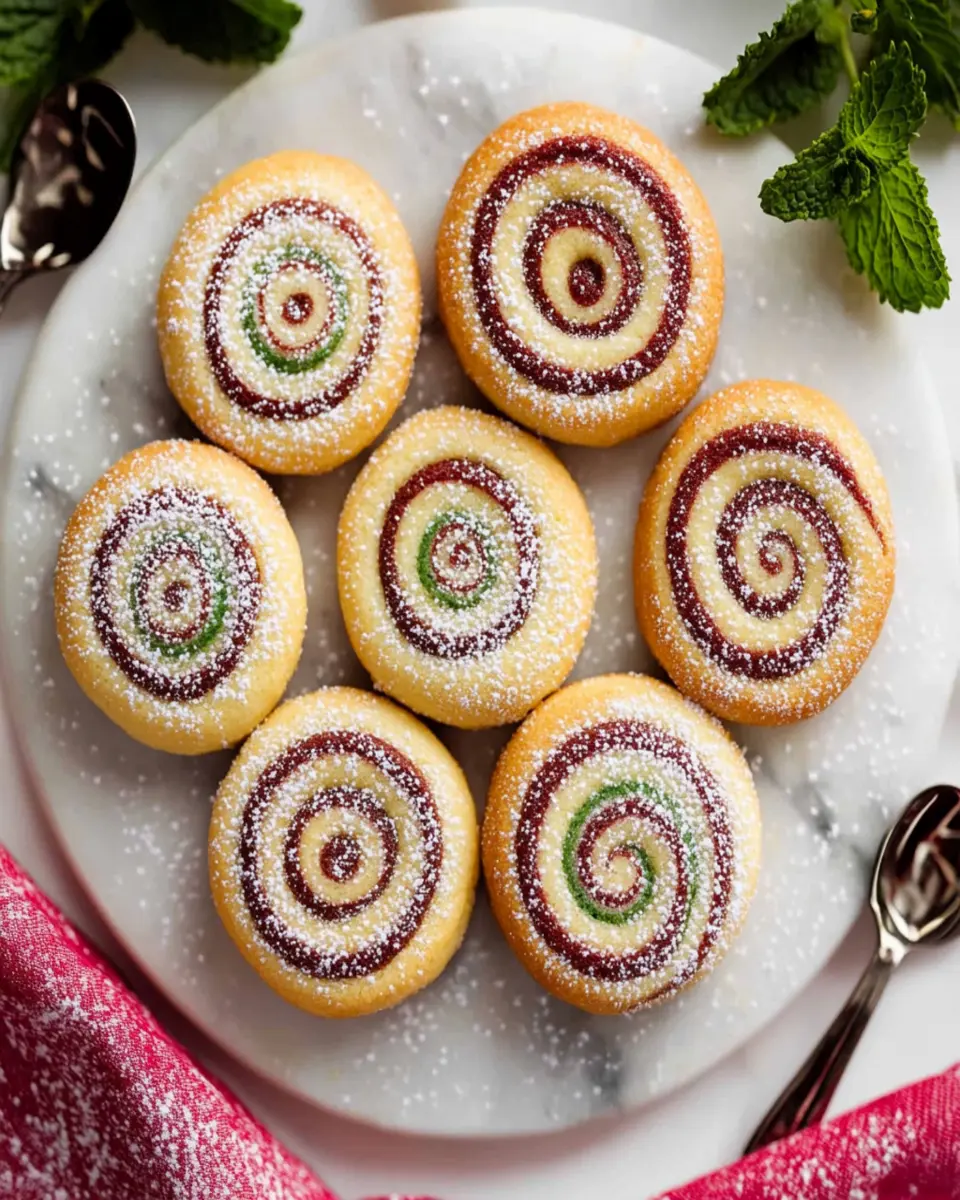
Colorful Layers
Experiment with colors to match your celebrations. For a festive touch, add food coloring to the dough before rolling it out. This is especially fun for holidays like Christmas or Halloween, where you can create layers of red and green or orange and black. The visual appeal of colorful pinwheel cookies will impress guests and make any occasion feel special.
Sprinkle Some Fun
Don’t forget about those optional sprinkles! Adding colorful sprinkles to the outer layer of the dough before rolling it into a log can create a fun and festive finish. This adds texture and a cheerful look, perfect for parties or just to brighten up a regular day.
These variations not only keep the recipe fresh and exciting but also allow you to express your creativity in the kitchen. So, feel free to experiment and discover your favorite combinations when learning how to make pinwheel cookies!

Cooking Tips and Notes
Making pinwheel cookies can be a delightful experience, especially when you keep a few handy tips in mind to ensure your baking success.
Chill the Dough
One of the best tips for achieving perfectly sliced pinwheel cookies is to chill the dough before cutting it. This not only helps maintain the shape of the cookies during baking but also makes slicing easier. Aim to refrigerate the log for at least an hour to ensure it’s firm enough to handle.
Experiment with Flavors
Don’t hesitate to get creative! This recipe is versatile, allowing you to swap out flavor extracts or even adjust the cocoa powder for a lighter or darker chocolate flavor. You can also add nuts, dried fruits, or even crushed candies for unique textures and tastes.
Bake with Care
Keep an eye on your cookies as they bake. Since oven temperatures can vary, start checking for doneness at around 8 minutes. You want the edges to be lightly golden, which indicates they are ready to come out of the oven. Over-baking can lead to a dry texture, so it’s better to err on the side of caution.
By following these tips, you can enhance your baking process and enjoy delicious pinwheel cookies that impress. Happy baking!
Serving Suggestions
Pinwheel cookies are not only delightful on their own but can also be paired with various treats and beverages to create an enjoyable snack experience. These colorful cookies make an excellent addition to any dessert platter, especially during celebrations or casual gatherings.
Pairing with Beverages
Consider serving your pinwheel cookies with a warm cup of tea or coffee. The rich flavors of chocolate and vanilla complement the bitterness of coffee beautifully, while tea adds a lightness that balances the sweetness. For a refreshing twist, serve them alongside a chilled glass of milk or even a fruity iced tea.
Creative Presentations
For a visually appealing display, stack the cookies in a glass jar or on a decorative platter. Add some colorful sprinkles or edible flowers around them for an extra touch of elegance. This not only makes for a beautiful presentation but also invites guests to indulge.
Enjoying with Friends
Finally, pinwheel cookies are perfect for sharing. Consider packing them in treat bags for friends or colleagues, making them a delightful surprise during a coffee break or as a thoughtful homemade gift. Enjoy your delightful pinwheel cookies in good company!
Time Breakdown
When it comes to baking pinwheel cookies, understanding the time commitment can help you plan your day better. Here’s a quick breakdown of the time involved in making these delightful treats.
Preparation
Preparation takes approximately 30 minutes. This includes gathering your ingredients, mixing the dough, and rolling it out into layers. It’s a straightforward process, perfect for a quick baking session.
Cooking/Baking
The baking time is around 10 minutes. You’ll want to watch the cookies closely, as they can go from perfectly golden to overbaked in a flash.
Total
In total, you’re looking at about 1 hour and 40 minutes, including chilling time. For efficiency, consider preparing the dough in advance and refrigerating it, allowing you to bake fresh cookies whenever the craving strikes!
Nutritional Facts
When indulging in pinwheel cookies, it’s helpful to know what you’re enjoying. Each serving, which consists of two cookies, contains approximately 100 calories, making them a satisfying treat without going overboard.
These cookies have 5 grams of total fat, which includes 3 grams of saturated fat. Each serving also contains 20 mg of cholesterol and 50 mg of sodium. With 15 grams of carbohydrates, they offer 1 gram of dietary fiber and 10 grams of sugar, providing a sweet burst of flavor. Additionally, each serving contains about 1 gram of protein, making them a delightful yet light dessert option for any occasion.
Understanding the nutritional breakdown can help you enjoy these delicious cookies without any guilt!
FAQ based on “People Also Ask” Section
When it comes to making pinwheel cookies, you might have a few questions. Let’s address some common inquiries to help you navigate this delightful recipe with ease.
What is the best way to store pinwheel cookies?
To maintain their freshness, store pinwheel cookies in an airtight container at room temperature. They can last for up to two weeks, making them perfect for preparing in advance for gatherings or snacks.
Can I freeze pinwheel cookies?
Yes! Pinwheel cookies freeze beautifully. After slicing the log, you can freeze the rounds on a baking sheet and then transfer them to a freezer-safe bag. Just bake straight from the freezer, adding a couple of extra minutes to the baking time.
How can I customize the flavors?
You can easily customize the flavors of pinwheel cookies by adding different extracts like almond or lemon, or by mixing in spices such as cinnamon or nutmeg. Additionally, feel free to experiment with various food colorings to enhance the visual appeal.
By addressing these questions, you’ll feel even more confident in your baking journey and ready to impress with your pinwheel cookies!
Conclusion
In conclusion, learning how to make pinwheel cookies is not just about baking; it’s about creating delightful moments that you can share with friends and family. These cookies are visually stunning, easy to prepare, and perfect for any occasion, from casual get-togethers to festive celebrations.
By following the straightforward recipe, you can enjoy the delicious combination of buttery vanilla and rich chocolate flavors that make pinwheel cookies a favorite among many. Plus, with the option to customize them by adding colors or flavors, the possibilities are endless!
So why not gather your ingredients and start baking? Your homemade pinwheel cookies will not only satisfy your sweet tooth but also impress everyone who gets to enjoy them. Don’t forget to save and share this recipe with fellow homemade-food lovers, and let the joy of baking bring you together!
Print
How to Make Pinwheel Cookies
- Total Time: 1 hour 40 minutes
- Yield: 24 cookies 1x
- Diet: vegetarian
Description
Delightful and colorful pinwheel cookies that are easy to make and perfect for any occasion!
Ingredients
- 1 cup unsalted butter, softened
- 1 cup granulated sugar
- 2 large eggs
- 1 teaspoon vanilla extract
- 3 cups all-purpose flour
- 1 teaspoon baking powder
- 1/4 teaspoon salt
- 1/2 cup cocoa powder
- 1/4 cup colorful sprinkles (optional)
Instructions
- Preheat your oven to 350°F (175°C).
- In a large bowl, cream together the softened butter and sugar until light and fluffy.
- Beat in the eggs one at a time, then stir in the vanilla extract.
- In another bowl, whisk together the flour, baking powder, and salt.
- Gradually add the dry mixture to the wet mixture, mixing until combined.
- Divide the dough into two equal portions. Stir cocoa powder into one portion to make chocolate dough.
- Roll out the vanilla and chocolate dough separately into rectangles on parchment paper.
- Carefully layer the chocolate dough on top of the vanilla dough and roll them into a log.
- Wrap the log in plastic wrap and refrigerate until firm, about 1 hour.
- Slice the log into 1/4 inch thick rounds and place them on a baking sheet.
- Bake for 8 to 10 minutes or until edges are lightly golden.
- Let cookies cool on a wire rack.
Notes
- For best results, chill the dough before slicing.
- Feel free to experiment with different colors and flavors by adding food coloring or extracts.
- These cookies can be stored in an airtight container for up to two weeks.
- Prep Time: 30 minutes
- Cook Time: 10 minutes
- Category: dessert
- Method: baking
- Cuisine: American
Nutrition
- Serving Size: 2 cookies
- Calories: 100
- Sugar: 10g
- Sodium: 50mg
- Fat: 5g
- Saturated Fat: 3g
- Unsaturated Fat: 2g
- Trans Fat: 0g
- Carbohydrates: 15g
- Fiber: 1g
- Protein: 1g
- Cholesterol: 20mg